
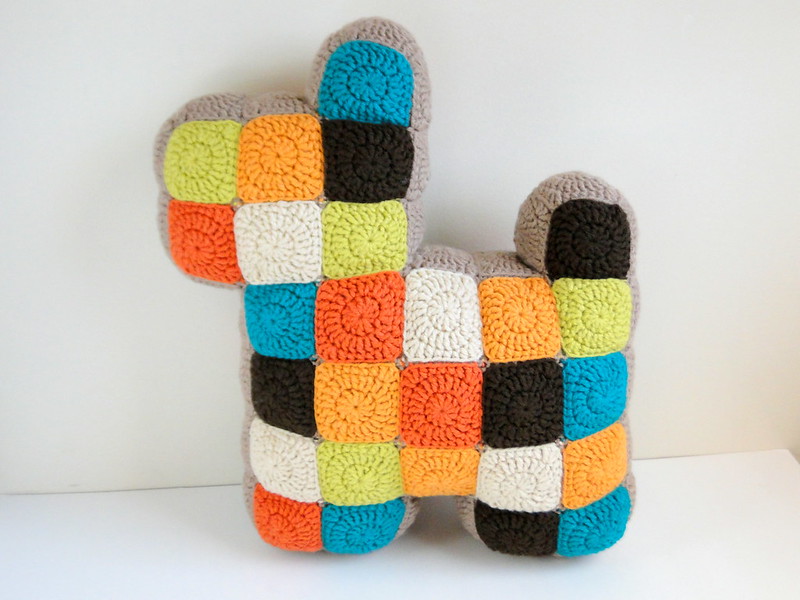
This is a tutorial to make a patchwork dog pillow like the one pictured above. To make the pillow you will need:
4mm hook (G)
various worsted weight yarns, amount depends on how many colors you use
stuffing (to stuff pillow)
a sewing needle
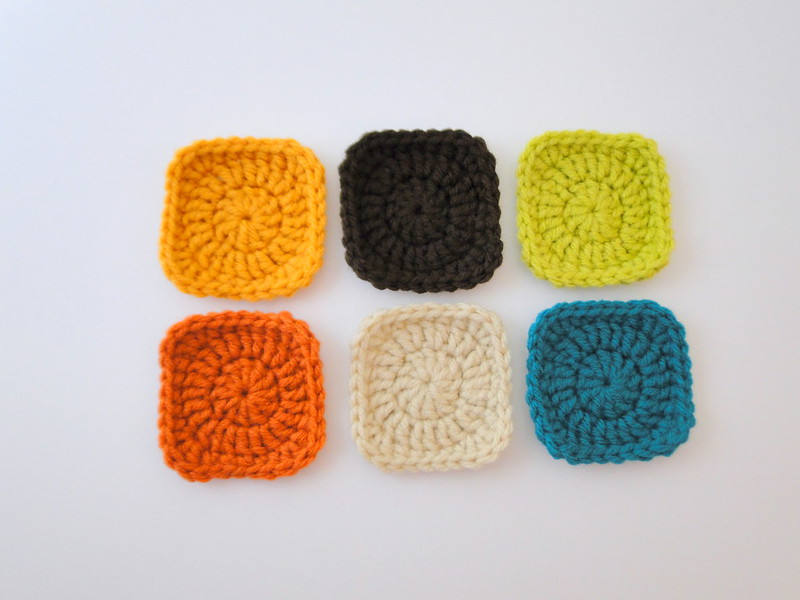
To start you will need to make 54 squares using this pattern. You can use any granny square pattern to make this pillow though.
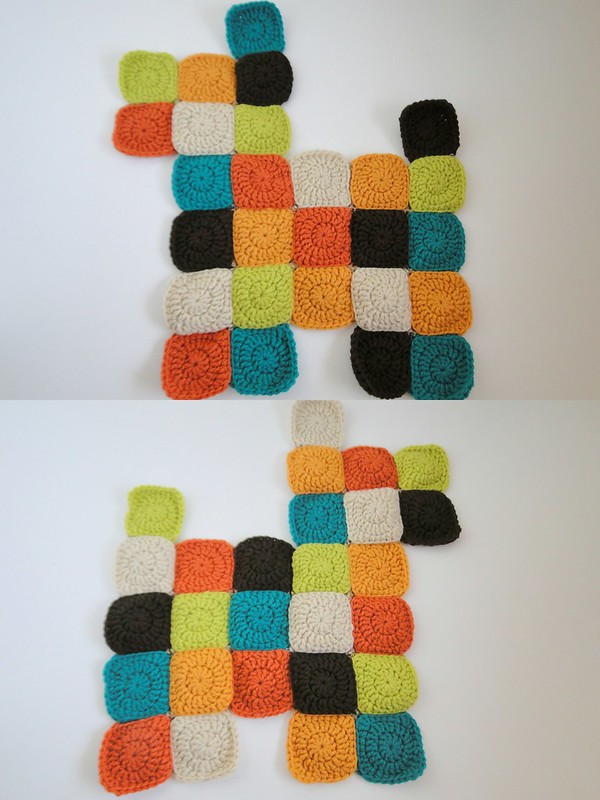
After you have all your squares finished, you'll want to lay your squares out in the shape of the dog (pictured below) for each side. They should mirror each other. Place the squares right sides together and using your crochet hook & yarn, join with a slip stitch through the back loops.
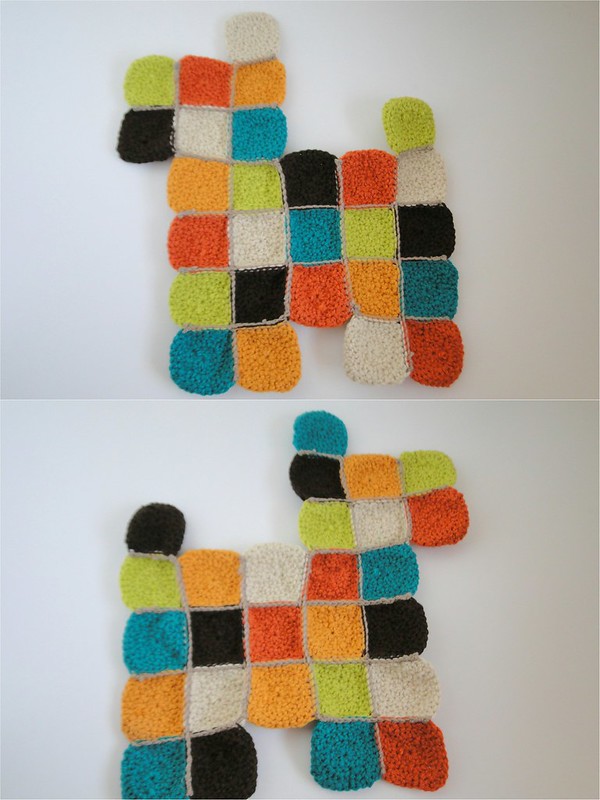
Now you should have both sides of you pillow finished. My squares look a little wonky but they'll be worked out during stuffing.
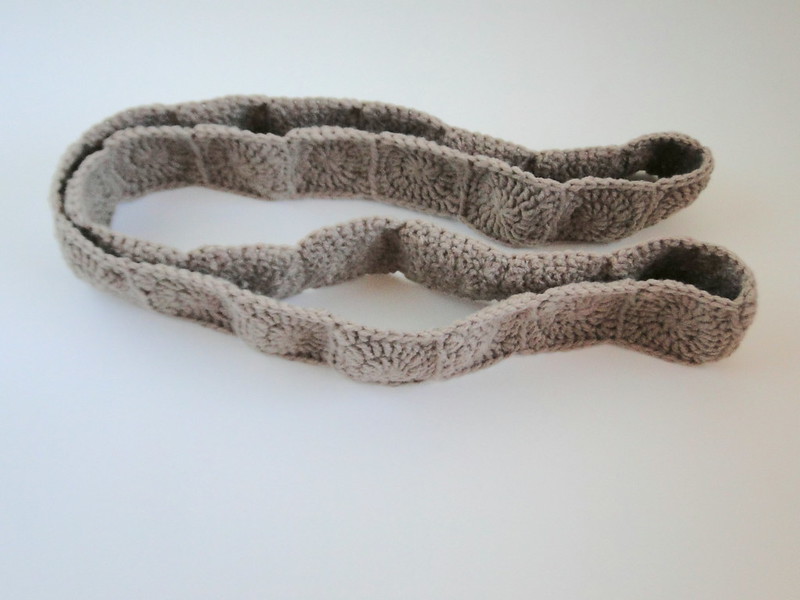
Now you will be making the strip of squares that joins the two sides together, you will need 30 squares. I made mine in all one color but you can continue the patchwork look if you'd like. I did the join as you go method for these squares to save on sewing afterwards. If you don't know how to join as you go, here is a great tutorial.
I didn't get any pictures for this next part unfotunately but I think you can figure it out without the visuals. You're going to take one side of your pillow and join the strip of 30 squares that you just crocheted to the outside edges, place the right sides together and slip stitch through all the backloops, make sure your squares line up properly. Now grab your other piece to the pillow and do the same with the other side of the strip, leave about 3 squares open for turning right side out. Once it's turned right side out, stuff your pillow and whip stitch the opening closed.

Now you have a finished patchwork dog pillow! Plop it on your couch, bed or wherever and enjoy!
I hope that makes sense! After writing it all out (especially the joining both sides part), I'm thinking of making another so I can get better step by step pictures! I ran out of decent light when finishing up this one, so I didn't get many great shots. If you make one, I hope you'll share a photo!

 Logging you in...
Ana Reyes · 616 weeks ago
I love ALL you do!
Greetings from Spain
Ana
Jeanne Feijo Machado · 616 weeks ago
Jeanne
Amanda · 616 weeks ago
Linda · 616 weeks ago
Louise · 615 weeks ago
Many thanks for this lovely pattern :-)
Linda · 615 weeks ago
Deb · 615 weeks ago
lieslree 37p · 614 weeks ago
Laura · 614 weeks ago
Nanci · 595 weeks ago
Michelle · 570 weeks ago
Isan · 541 weeks ago
Teresa · 537 weeks ago
Mark · 498 weeks ago
dorisdalvarado · 498 weeks ago
Nadia B. · 498 weeks ago
Darja · 494 weeks ago
ritu · 481 weeks ago
try to visit my 12 inch drop bed skirt whenever you get the time.
tjmword 1p · 445 weeks ago
jodiemorgan 1p · 367 weeks ago
Donna Taylor · 239 weeks ago
.